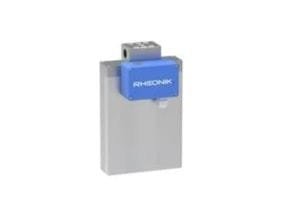
Rheonik RHM10 Coriolis Flow Sensor stands as the industry benchmark for small-scale production, offering unparalleled accuracy for continuous low-flow monitoring and intricate small-batch dispensing.
The Rheonik RHM 10 is a Coriolis mass flow sensor designed for precise measurement in small-scale production settings, particularly where continuous low flow and small batch dispensing are required. Its versatile construction makes it suitable for a wide range of flow applications.
Specifications of Rheonik RHM10 Coriolis Flow Sensor
- Range: 0.25 kg/min up to 90 kg/min
- Pressure: up to 1384 bar (20073 psi)
- Temperature: -196°C (-321°F) up to +210°C (410°F)
- Accuracy: 0.1 % of the rate
- Materials: SS 316L / SS 316Ti, Super Duplex – 1.4410, Sandvik HP160
- Process Connection: ½” up to 1 ½”
General Specifications of Rheonik RHM10 Coriolis Flow Sensor
| Nominal Flow (Q???)* | 60 kg/min (132 lb/min) |
| Maximum Flow (Q???)* | 90 kg/min (198 lb/min) |
| Typical Minimum Flow (Q???)* | 0.25 kg/min (0.55 lb/min) |
| Serial Tube / Single Path | Flow rates Qmax, Qnom, and Qmin for “serial” sensors will be 50% of the above-listed parallel/dual path version. |
| Operating Temperature | Fluid temperature range options cover from -196 °C to +210 °C (-320 °F to +410 °F) For integral transmitter versions please refer to the transmitter datasheet |
| Ambient Temperature | -50 °C to +80 °C (-60 °F to +180 °F). High-temperature version for oven installation up to +210 °C (+410 °F) available |
| Pressure Ratings | Up to 1379 bar / 20000 psi – dependent upon material |
| Electrical Connection Sensor w/o Integral Transmitter | M20 x 1.5 standard cable entry for JM, SM terminal box versions Optional entries available : ½” NPT or M25 x 1.5 (only for SM) or ¾” NPT (only for SM) M16 x 1.5 standard cable entry for PM terminal box version Max. cable length to remote RHE transmitter 100 m/330 ft |
| Sensor Enclosure Materials | Stainless steel 304 (standard), SS 316 (optional) Coated aluminum terminal box, SS 316 terminal box (optional) |
| Enclosure Type | Protection class IP 66, NEMA 4 (standard), IP 66/67, NEMA 4X (optional) |
| Wetted Materials | Flow tubes SS 316L, SuperDuplex or Sandvik HP160© Manifolds SS 316L seals FKM, FFKM, FVMQ Standard flanges SS 316Ti, other connections SS 316L Additional/customer-specific materials available upon request |
| Process Connections | Nearly any – the Rheonik AnyPipeFit Commitment. Consult factory for types/sizes not listed in this data sheet on the Mechanical Construction pages |
| Pressure Rating Compliance | PED 2014/68/EU Article 4, Section 3 (SEP) |
| Certifications and Approvals | ATEX / IECEx Approvals Zone 0, 1, 2 (see page 19) North American Approvals Cl. I, Div. 1, 2, Gr. A, B, C, D, Zone 0, 1, 2 OIML, MID custody transfer approval American Bureau of Shipping (ABS) Product Type Approval for use on marine vessels |
| Testing and Inspection | All sensors are hydro-tested, calibrated, and supplied with a traceable calibration certificate. Customized calibration and testing services are available |
| Project Documentation and QA, Services | Rheonik offers a full set of services for large and complex engineering projects. Typical services offered are, but are not limited to:•Certificates of origin and conformity, mill certificates•Data books including WPAR, WQS, NDT, test & quality plans, functional testing, calibration procedures, customized packing, factory acceptance, etc.•Painting to project specification•Start up and commissioning services on/offshore |
| Options | Customization services for machine integration. Consult factory |
Applications of Rheonik RHM10 Coriolis Flow Sensor
Typical applications include:
- General Flow Control
- Additive Dosing
- Mixing and Batching
- Chemical Injection
- Package and Container Filling
- Hydrogen Dispensers for Trucks, Trains & Buses
Features of Rheonik RHM10 Coriolis Flow Sensor
- The typical measuring range is up to 90 kg/min (198.42 lb/min)
- Pressure ratings up to 1379 bar (20000 psi)
- Temperature ratings from -196 to +210 °C (-320 to +410°F) – extended on request
- Mass flow uncertainty down to 0.05 %
- Repeatability down to 0.05 %
- 4 kHz measurement updates and response time of less than 10 ms when used with RHE 40 Series transmitters
- Accurately measure flow rates down to 250 g/min
- The Rheonik AnyPipeFit Commitment provides custom process connection type and size flexibility on any meter to suit your existing plant, saving time and expense on installation costs
- Compact design with minimal pipeline footprint
- Approved for use in hazardous areas
- SS 304 Stainless steel enclosure, SS 316 optional
- Integral and remote transmitter versions are available
Mechanical Construction of Rheonik RHM10 Coriolis Flow Sensor
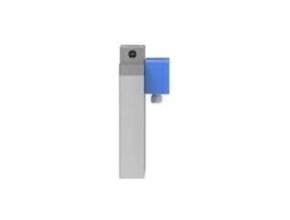
Sensors are manufactured with two internal measurement tubes arranged side by side. In parallel or dual path sensors (order code Pxx), these tubes are connected in parallel and the flowing fluid is split equally between them. In serial or single-path sensors (order code Sxx), the internal tubes are connected end to end, creating a single path through which all fluid flows. Manifold designs have a removable inlet/outlet manifold block and utilize selectable seals between the manifold and sensor body. In sealless designs, the measurement tubes are continuous between the process connections and do not have seals. Manifold designs offer shorter delivery lead times and may have a lower pressure drop than sealless designs for the same flow rate.
Performance Data of Rheonik RHM10 Coriolis Flow Sensor
- Flow Measurement Uncertainty
Selected Sensors down to ±0.05 % ¹ of rate (Gold Line)
Standard Sensors down to ±0.15 % ² of rate - Flow Measurement Repeatability
Down to ±0.05 % of rate - Temperature Measurement
Better than ±1 °C - Density Calibration (Liquid)
Selected Sensors down to ±0.0005 kg/liter (Gold Line)
Standard Sensors down to ±0.001 kg/liter
Measurement Tube Pressure Ratings
The maximum pressure (Pmax) of a sensor is determined by its lowest-rated part. The lowest rated part can be either the measurement tube (Pmax indicated below), the connection block/manifold
(Pmax indicated in the mechanical construction section) or the process connection (for Pmax see published standards or manufacturer information).
Uncertainties and Flow Measurement Turn-down
The mass flow of water, 18 to 24 °C, and 1 to 3 bar in a typical temperature, pressure, and material configuration sensor are the reference conditions that are used in all uncertainty claims. Gas uncertainty values, which are equal to the liquid value plus 0.3%, can be measured by the sensor. Natural gas mass flow, temperatures between 18 and 24 °C, and pressures between 35 and 100 bar in a conventional temperature, pressure, and material configuration sensor are the reference conditions for gas.
The zero-point stability of the flow sensor is the primary factor that drives its turn-down capabilities from the Qnom. At the very low end of the measuring range, zero-point stability dominates the uncertainty (u). A typical sensor has a zero point stability of 0.000036 kg/min (0.000079 lbs/min). Gold Line sensors have a zero stability of 0.000019 kg/min (0.000042 lbs/min).
For flow Q ? zero stability / (calibration uncertainty/100) u = calibration uncertainty
For flow Q < zero stability / (calibration uncertainty/100) u = (zero stability/Q) x 100
Uncertainties from environmental and process conditions
- If sensors are not zeroed at operating conditions, minor additional uncertainties can arise from elevated temperatures and pressures: ±0.00308 % of maximum flow per °C and ±0.0208 % of maximum flow per bar.
- Process temperature effect on density: additional uncertainty of ±0.000641 g/cm³ per °C difference from calibration temperature with standard density calibration and of ±0.000073 g/cm³ per °C difference from calibration temperature with enhanced density calibration. This effect can be mitigated by a simple field density adjustment at operating conditions.
- Process pressure effect on mass flow: The effect of pressure on flow measurement is 0.001 % of the rate per bar. Compensation is possible by pressure sensor input (analog input or digital write) or manual value entry into the transmitter.
- Process pressure effect on density: The effect of pressure on density measurement is 0.00012 g/cc per bar. Compensation is possible by pressure sensor input (analog input or digital write) or manual value entry into the transmitter.
Source: www.rheonik.com
Read More Articles:


